Attacks
Backdooring PuTTY: Trust no one

VP of Hacking
Updated
Jun 25, 2020
14 min
The Internet is a dangerous place. It contains billions of points that can be accessed using an ever-increasingly range of devices. Endpoint protections are improving over time, but there is always a new technique that overcomes them.
Antivirus software is a clear example of an endpoint protection method that’s constantly improving, trying to overcome its limitations.
Most antivirus offerings use signatures to detect malware. A signature is nothing but a sequence of bytes.
As an example, I extracted the today’s Clamav AV signatures, picked a random entry:

And put it on a file called virus:
Check it using VirusTotal:
And it’s detected as an expected virus.
But then I changed a single byte: The last f0 for an fa:
And check it again:
The check failed! Antiviruses based on signatures are easily fooled.
In this post, we will be able to backdoor the latest available version of PuTTY (0.73 to the date of this writing) with a reverse shell. We will also try to evade today’s modern antiviruses, which are not only based on signatures but also on behavior.
Strategy
The following are the steps that we will take to convert the original putty.exe to its backdoored version:
Find space to include our shellcode.
Check the current
putty.exePE properties and modify them as needed.Add a shellcode.
Redirect the execution flow of the application to our code.
Restore execution flow.
Encode shellcode to avoid antivirus detection.
Finding space
If we are going to inject new code into a file, we must find a memory block with the required space to manipulate without modifying the normal flow of the application.
These "blank" spaces are known as code caves and are present on almost any executable file. They are composed commonly of 0xCC, 0x90, or 0x00 bytes.
There are several tools that help us finding code caves. The tool I prefer is Cminer. Let’s run it over our putty.exe file, and tell it that looks for code caves of 500 bytes or more:
We will use the last one for this example, which contains 509 bytes.
Getting executable characteristics
The code cave we chose is located in the .00cfg PE section.
Sections are the way the different regions of the virtual memory of a PE file are distributed. There are several predefined sections, and each of them has specific purposes, mostly determined by the characteristics than for the section name itself. In fact, the name can be anything, and the PE header will have pointers to them.
There is a section called .text, which is commonly used to store the executable code of the file. As that section is meant to be executable, its characteristics are commonly READ | EXEC.
Likewise, there are other sections that hold initialized data and global variables like .data and .bss whose contents are only meant to be READ | WRITE, and not executed.
The section on which our code cave is located is .00cfg, which is a non-standard section. We can check its current characteristics using many tools. I will use PE Tools:

As we can see, that section has currently only permissions to be read. However, as we need to execute code there that will self-decode, we must enable the WRITE and EXEC characteristics:
ASLR
The putty.exe is a standalone executable. We may expect that the virtual address space of an executable file at rest is the same as when it’s launched and a process instance is created. However, every time we load putty.exe on a debugger, the address space changes on memory. This is because of something called Address Space Layout Randomization or ASLR. This is protection added to executable files to make it hard for attackers to exploit overflows using absolute addresses.
It can be pretty annoying during a backdooring session, but it can be disabled while we finish and can be enabled at the end. Let’s do that:
As you can see, I used CFF explorer to change the DLL Characteristics of the putty.exe file and disabled the DLL can move option, which is the indicator of the presence of ASLR.
We must remember to be careful to use relative calculations and avoid absolute addresses, or ASLR will take its toll at the end.
With that in place, we can start the backdooring process.
A needed parenthesis
Before going into inserting new bytes into our file, we must check two things: Whether the file is still working as originally expected and if it’s flagged as malicious.
The first check is easy:

It’s still working.
The result of the second check is something expected:
This tells us that 14 out of 74 antiviruses flag this new file as malicious.
In contrast, the original file was only flagged by 4:
We must keep those values in mind to have something to compare our final file with.
Let’s resume our process!
Making up the code cave
Before injecting a shellcode, we need to locate the code cave on our file. Cminer showed that it started at 0x4bb003, and as we disabled ASLR, we should be able to locate it at that exact address. I will use x64dbg a modern open-source debugger for Windows:

Great, as you can see, our code cave it’s a region full of 0x00 bytes. It’s a good idea to change those 0x00 to something that doesn’t block the execution flow, like NOPs (0x90). To do that, we need to select the addresses we want to modify, then right-click on the CPU window, select Binary and finally Fill with NOPs.

With that, we have an empty canvas to work on.
It is also a good idea to save every progress of the backdooring in a separate new file, so we can go back if anything’s not working. To do that, we can issue Ctrl+P that will show the actual current changes we’ve made and save the "patches" to a new file.

With that in place, we can start injecting instructions into our code cave. The first thing we must do is save the current value of the CPU registers and flags, so we can restore the normal flow of the application after executing our shellcode. If we don’t do that, the application will have unexpected behavior, and the backdooring will be detected!
The instructions for saving the CPU registers and flags are:

At the end of our code cave, we should have to restore that information from the stack. We will see that later.
We are now ready to inject the shellcode.
Generating shellcode
As you probably know, a shellcode is a piece of carefully arranged bytes that can execute anything, commonly a shell.
In our example, we will create a shellcode that connects back from the victim to the attacker machine and serves a reverse shell.
To do that, we will use msvenom:
Notice that I chose LPORT=443 instead of the default 4444. This will hopefully help to disguise this reverse shell a little.
We can now insert those bytes on our code cave.
Here we can see the addresses on where the pushad/pushfd instructions were injected:
To make some room for any needed encoder/decoder, I will use the address 004BB060 as the place where the shellcode will be placed. To inject the shellcode, we must select the output of msfvenom in hex format, then on the debugger select an address region large enough to fit our shellcode, then right-click, select Binary and then Paste.

Great! We can now save the changes to a new file putty-02.exe:

Diverting execution flow
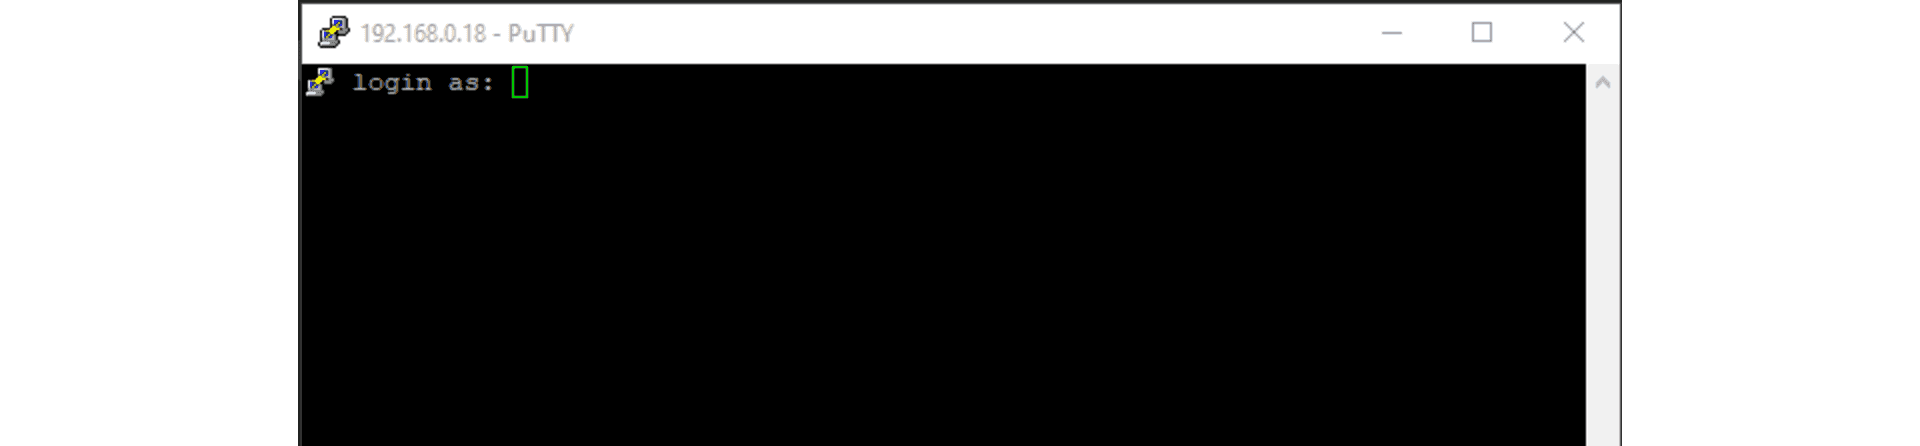
Now that we have our shellcode in place, we need to change the execution flow of putty.exe to point to our code cave. You can choose at what part of the execution you want to have the shellcode triggered. Some may want it to happen at the very start, overwriting the entry point. In this example, we will trigger it when the user connects to a server and the login as: text appears:
Using our debugger, we need to find on where the login as: string is issued:

We had two locations, and we need to know which of them is the one we need, so we had to put breakpoints and check:

We got a hit!
As you can see, we hit just before a call. I mentioned before that we need to use relative calculations to overcome ASLR limitations. That’s why we will divert the execution after the call, here:
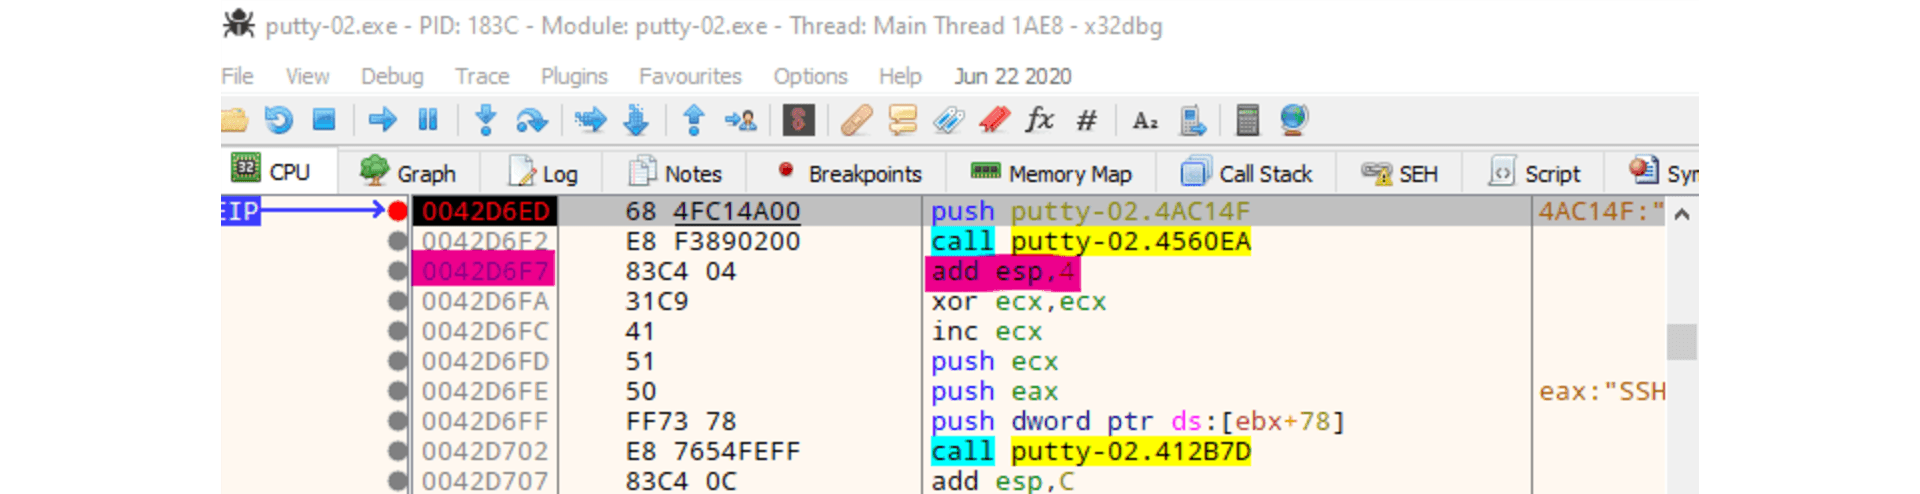
Now, copy some instructions to a text file, starting at 0042D6F7, so we can later restore the execution to this point:

Having done that, we need to make a jump to the first instruction of our code cave. That instruction is pushad located at 004BB004. Let’s do that:

Now I will save the modifications to patch-03.exe.
Remember that we need to restore the execution flow after our shellcode. Let’s do that.
Restore execution flow
To completely restore the execution of PuTTY, we need to do several things:
Get the value of
ESPafter the execution of thepushad/pushfdinstructions.Get the value of
ESPafter the shellcode is completely executed.Get the offset using
ESP1 - ESP2 = offset.Align
ESPwith the resulting offset.Pop back the CPU registers and flags using
popfd/popad.Restore instructions overwritten by the
jmpto the code cave.Jump to the next instruction after that jump.
Get ESP before shellcode
We can do that easily by putting a breakpoint after the pushad/pushfd calls and taking note of ESP:

The ESP value is 0019FE30.
Get ESP after shellcode
This can be obtained after the shellcode is executed. Remember to open a listener in the attacker machine:

Great! We got the shell, and the ESP value is 0019FC30. However, the breakpoint was reached only after exiting the shell. We will need to modify the shellcode later.
Get the offset
This one is easy: 0019FE30 - 0019FC30 = 0x200.
Align ESP + Restore registers and flags
Now we need to point ESP to the value after pushad/pushfd. We also need to restore the registers and flags. This can be done easily with:
We can now add that to our file:

Restore instructions + Jump to normal flow
If you remember, the original point from where we diverted the execution was:
And the resulting instructions when we added the jump to our code cave were:
That means that we overwrote two instructions: add esp,4 and xor ecx,ecx, and they need to be restored. We also see that the next instruction in the normal execution flow is located at 0042D6FC. So, to finish our restoration, we need to add this:

We can now save the changes to a new file patch-04.exe:

At this point, we should be able to launch PuTTY, get a shell, and resume normal execution:

However, as you can see, the execution is only resumed when the shell exits.
Patching shellcode
That behavior is caused by the way the reverse shell was implemented on Metasploit. It uses a call to WaitForSingleObject that instructs the parent process to wait infinitely until the shell process is done. This makes the shellcode more reliable, but for our purpose, we need a different behavior.
The WaitForSingleObject function signature is:
Taken from https://docs.microsoft.com/en-us/windows/win32/api/synchapi/nf-synchapi-waitforsingleobject.
Our reverse shell sets the value of dwMilliseconds parameter to -1, which makes it wait forever for the process to finish. That value is set at this position on the shellcode:
We just need to change it to a NOP and we should be ready:

Let’s run our saved putty-05.exe:

Mission accomplished! We’ve got now a fully functional, yet backdoored PuTTY.
Encoding our shellcode
Let’s see how we are doing with antivirus detection:
Not so great. To improve that metric, we will need to encode our shellcode using a self-made encoder.
A common method is to use the XOR instruction on every byte, but an average antivirus nowadays will be able to revert it easily. We are going to try something more.
The mutations we perform over the code must be reversible, so for the sake of this example, I will use this encoder strategy:
XORbyte with key0xD.Add
0x2to byte.Bit-wise negate byte.
Rotate left 8 bits.
encoder.
And the decoder should be the instructions in reverse order:
Rotate right 8 bits.
Bit-wise negate byte.
Sub
0x2to byte.XORbyte with key0xD.
decoder.
The encoder should be used only once, to mutate the file. Then, when the encoded shellcode is in place, the decoder should be finally inserted so it can self-decode on memory every time it’s launched.
The full stub we are going to insert is:
Encoding
Let’s encode the shellcode first:

Save that changes to a file called putty-06.exe.
Now, we can watch the process of encoding in real-time:

Wonderful. Now, select those modified bytes, then right-click, then Binary, then Copy. Restart the debugging session with Ctrl+F2 and go to that address region again and hit Shift+V to binary paste.
We are now ready to patch the file to a new one called putty-07.exe.
Decoding
All that’s left is to replace the encoder with the decoder on our putty-07.exe file:

And save the patches in a file called putty-final.exe.
If everything comes as expected, putty-final.exe will run, decode itself in memory, send us a reverse shell and resume normal execution.

Yes! Scary, huh?
Antivirus detection
Now, let’s see how our manually encoded PuTTY is tagged in VirusTotal:
Awesome! We were able to lower the ratio of antivirus tagging from 27 to 10!
Conclusion
The Internet is full of dangers. We hope this article has shown you the risks of running software obtained from untrusted sources.

Get started with Fluid Attacks' PTaaS right now
Other posts